


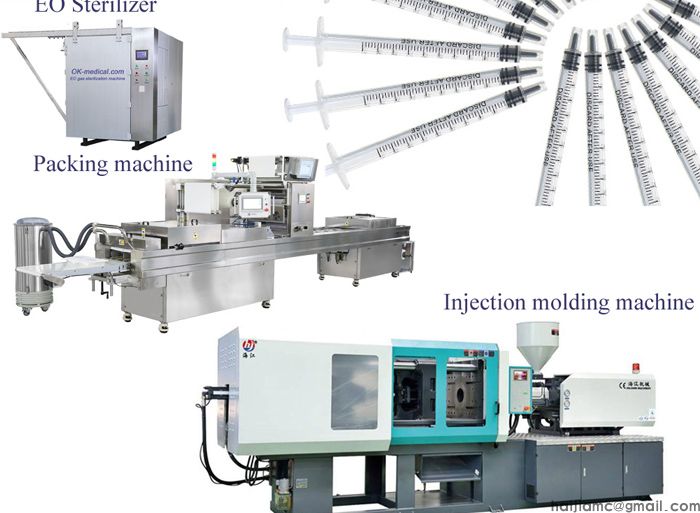
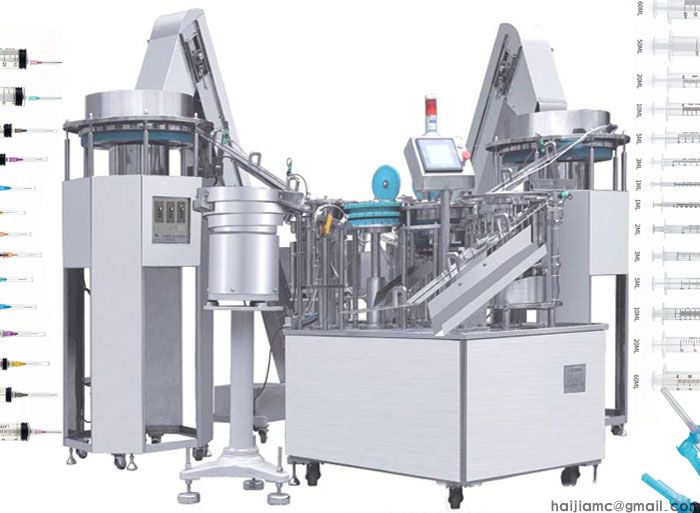

I was sitting in the doctor’s office the other week, just waiting to get some blood work done, and I found myself staring at that little tray of tubes next to the nurse. You know the ones. They usually have these purple or lavender caps. The nurse probably doesn't think twice about them, and neither does the patient, but I couldn't help but pick one up and look at the bottom. It’s a habit. When you’ve spent as much time around manufacturing lines as I have, you start looking for gate marks and flow lines on everything. It drives my wife crazy. We call these things EDTA tubes. It’s basically just a fancy way of saying it has a chemical inside that stops your blood from turning into a solid lump before it gets to the lab. But making them? It is a whole different beast than just making a plastic spoon or a toy. The precision needed is actually kind of stressful if you think about it too much. So, the line starts where pretty much all plastic stuff starts. You’ve got your raw material, usually PET granules. It looks like little glass beads. Now, here is where beginners mess up. You cannot just dump that stuff into the machine. Plastic absorbs moisture from the air like a sponge. If you try to melt wet plastic, you get bubbles and weak spots. We call it "splay." It looks terrible. That’s why the **hopper dryer** is probably the most underrated piece of gear in the shop. It sits up top and cooks the moisture out of the pellets for hours. If the hopper dryer quits on you, you might as well shut down because everything coming out of the mould is going to be garbage. Getting the plastic up there used to be a pain in the back, literally. I remember hauling bags up ladders in the old days. Now, most decent setups use an **auto loader**. It’s just a vacuum hose system that sucks the pellets out of the bag and dumps them into the dryer. It makes a distinct *woosh-clatter* sound that becomes background noise after a while. Once the plastic is hot and dry, it drops into the belly of the beast: the **plastic injection molding machine**. This is the loud part. The machine has this massive screw inside a heated barrel that melts the plastic into a thick goo, almost like honey but way hotter. Then, *wham*. It injects that molten plastic under crazy high pressure. It’s shooting it into the **mould**. The mould is the expensive part. It’s this heavy block of steel with cavities carved out in the shape of the test tubes. For medical stuff like blood tubes, the mould has to be perfect. And I mean perfect. If there is even a tiny scratch, the tube won't be clear, or worse, it won't seal right. And because these tubes are PET, they need to be cooled down fast to keep them clear. If they cool too slow, they turn hazy and white. That’s why you’ll see a **chiller** hooked up to the mould. The chiller pumps freezing cold water through channels in the steel to snap-freeze the plastic into shape instantly. I’ve had days where the chiller loop gets clogged or the temperature fluctuates, and you end up with thousands of cloudy tubes that are totally useless. It’s heartbreaking to see that much waste. Speaking of waste, it happens. Machines jam, heaters burn out, or sometimes the setup just isn't right on a Monday morning. When we get bad tubes—maybe they are short shots or have black specks—we don't just toss them in the landfill. That’s money down the drain. We throw the rejects into a **crusher**. It’s this violent, noisy grinder that chews up the bad plastic tubes into flakes so we can melt them down and try again. Although, for medical tubes, you have to be careful how much recycled stuff you use. You don't want to push your luck with quality. But making the plastic tube is only half the battle. It’s just a hollow piece of plastic until you treat it. The "EDTA" part is a liquid—well, usually a spray—that gets dosed inside. The machines have to spray a tiny, precise mist of this anticoagulant on the inner walls. If you miss a spot, the blood clots. If you put too much, it messes up the blood cell count. I’ve spent hours just calibrating those spray nozzles. They clog if you look at them wrong. Then comes the assembly. Capping them. Applying the labels. And the vacuum. That’s the cool part. They suck the air out of the tube before putting the rubber cap on. That negative pressure is exactly calculated so that when the nurse sticks the needle in, the tube sucks in exactly 2ml or 5ml of blood. Not more, not less. It’s simple physics, but getting it consistent across a million tubes is a headache. It’s a lot of moving parts. You’ve got the heat, the pressure, the chemistry, and the vacuum all having to work together. And most people just see a piece of plastic they throw away after five minutes. Kind of funny when you stop to think about the effort involved. I still check the bottoms of the tubes though. Can't help it.
Country